Backyard Chicken Coop
How to Build a Backyard Chicken Coop: A Beginner's Step-by-Step Plan
A small flock of backyard hens is one of the most rewarding projects you can add to a yard, and the coop is the part you can build yourself over a few weekends. This guide covers the decisions that matter most for a first coop: how much space your hens need, where to put it, how to keep predators out, how to ventilate it, and a practical build order with a materials list.

Free printable: Backyard Shed Planning
A practical pre-build checklist. Enter your email to get the PDF.
1. Check the rules and decide on flock size
Before you buy a single board, find out what your town, county and any homeowners' association allow. Rules vary a lot. Common limits include a maximum number of hens, a ban on roosters, minimum distances from property lines or neighbors' houses, and sometimes a permit for the coop itself if it is above a certain size. A quick search for your city name plus "backyard chickens ordinance," or a call to the planning office, usually answers it.
Then decide how many birds you really want. Chickens are social, so plan for at least three. For most families, three to six hens is a comfortable first flock: enough company for the birds and a steady supply of eggs, without overwhelming your yard or your schedule. Design the coop for the flock you might grow into, because almost everyone ends up wanting "just two more."
2. Size the coop and the run
Crowding is the root of most coop problems: pecking, dirty bedding, smell and sick birds. Common guidelines for standard-size hens are:
- Inside the coop: about 3–4 square feet of floor per hen (bantams need roughly half).
- In the run: about 8–10 square feet per hen. More is always better.
- Roost bar: 8–12 inches of perch length per bird.
- Nest boxes: one box for every four or five hens, about 12 × 12 inches each.
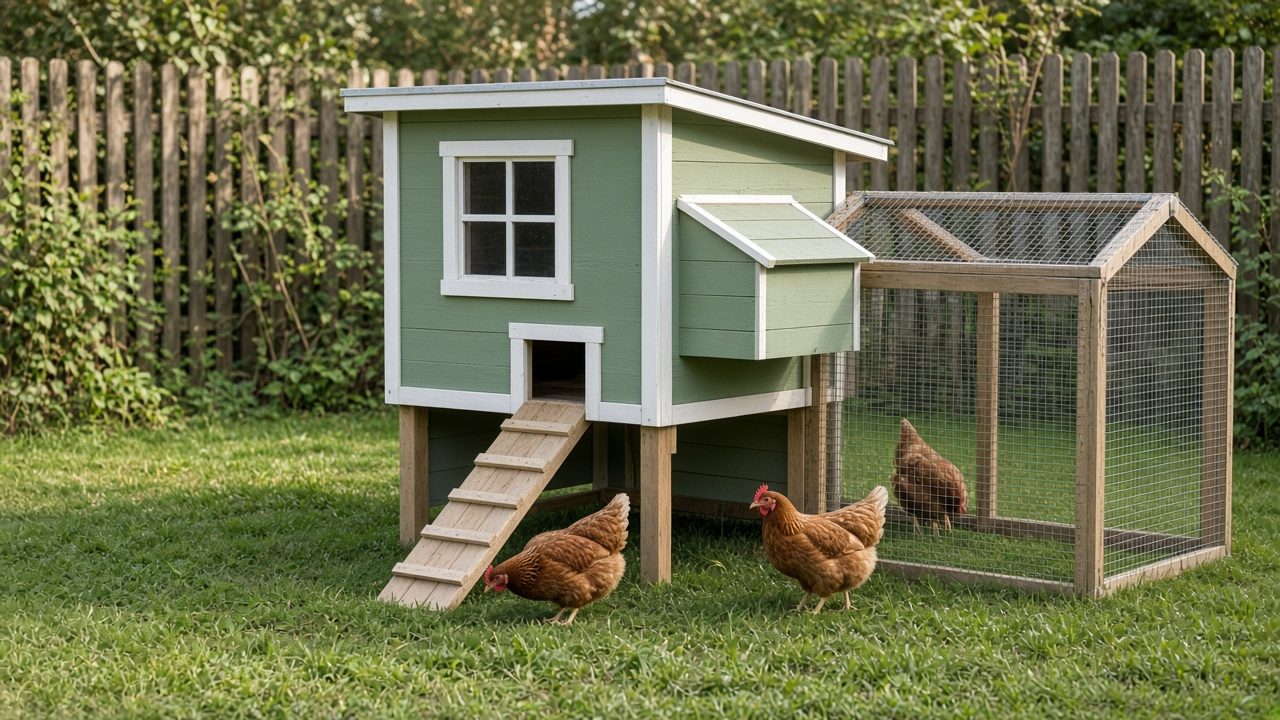
So a flock of four hens needs a henhouse of roughly 4 × 4 feet and a run of at least 4 × 10 feet. A popular beginner layout is a raised henhouse sitting 18–24 inches off the ground, with the run underneath and extending out to one side. Raising the house keeps the floor dry, gives the birds shade underneath and makes cleaning easier on your back.
Tip: Make sure you can reach every corner. A wide human door or a hinged roof panel turns a 30-minute cleanout into a 10-minute one.
3. Pick the right spot
Walk your yard and look for a place that ticks most of these boxes:
- Good drainage. Avoid low spots where rain puddles. A muddy run is unpleasant and unhealthy.
- Morning sun, afternoon shade. Chickens handle cold better than heat. Shade from a tree or the house on summer afternoons matters a lot.
- Shelter from the prevailing wind. Put the solid back wall of the coop facing the wind.
- Easy access for you. You will visit at least twice a day, in rain and in the dark, so a short, level path from the back door helps.
- Respect for the neighbors. Keep within your setback rules and away from their patio or bedroom windows.
4. Predator-proofing that actually works
Raccoons, foxes, dogs, hawks, rats and snakes all want your chickens or their eggs. Predator-proofing is the most important part of the build, and the place not to cut corners.
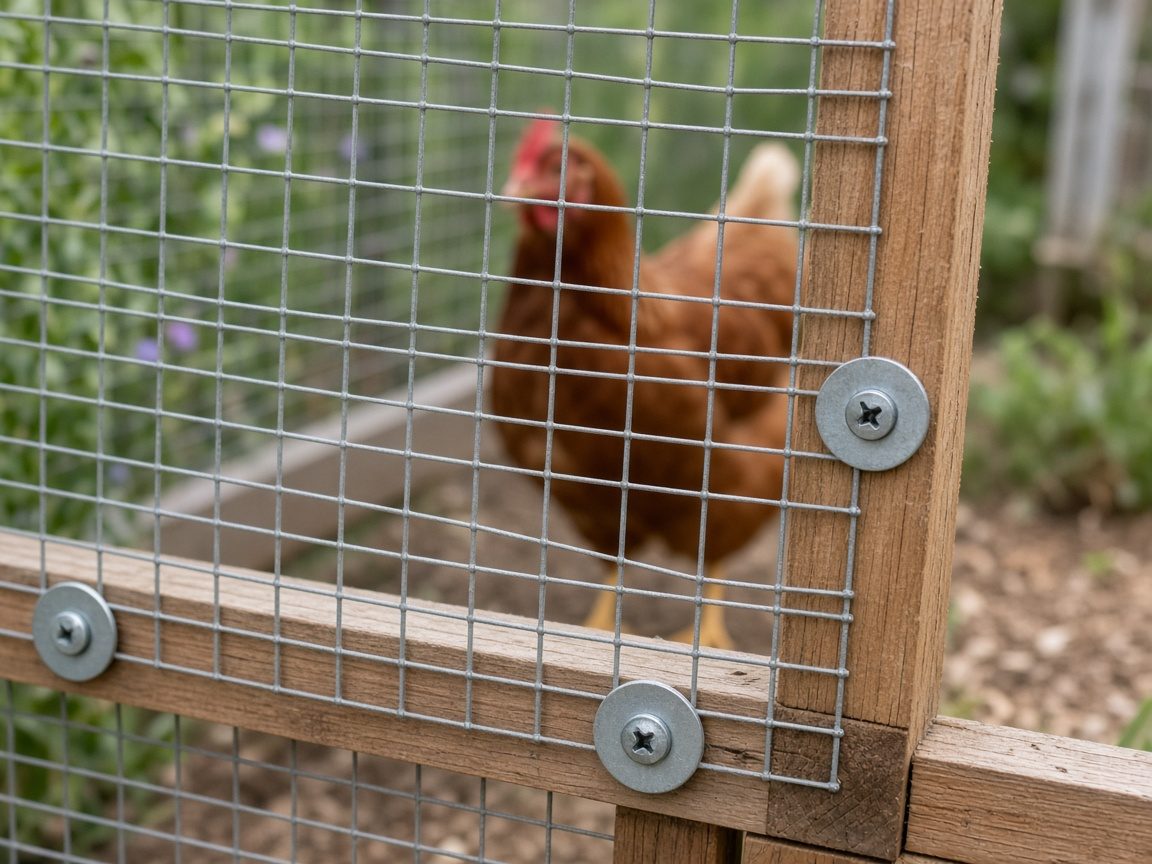
- Use hardware cloth, not chicken wire. Chicken wire keeps chickens in, but a raccoon can tear it or reach through it. Use 1/2-inch galvanized hardware cloth on the run and on every vent opening.
- Stop diggers. Lay a 12–24 inch "apron" of hardware cloth flat on the ground around the outside of the run and cover it with soil or pavers, or bury the mesh at least 12 inches deep.
- Fasten it properly. Staples alone can pull out. Use screws with large washers, or wood strips screwed over the mesh edges.
- Use real latches. Raccoons can open simple hooks and slide bolts. Choose two-step latches or spring clips on every door.
- Cover the run. A roof of mesh or solid panels keeps out hawks and climbing predators.
- Close the pop door at night. An automatic door opener is a popular upgrade if your schedule varies.
5. Ventilation without drafts
Chickens breathe out a lot of moisture, and their droppings release ammonia. A coop that is closed up tight will be damp and smelly, and damp air is worse for hens in winter than cold air. The goal is plenty of airflow above the birds, with no wind blowing directly on them where they roost.
A common rule of thumb is about one square foot of ventilation per bird, placed high on the walls near the roof line: gable vents, a gap under the eaves or a long screened slot above the roost. Cover every opening with hardware cloth. In cold climates you can partly close vents on the windward side in winter, but never seal them completely.
6. Roosts, nest boxes and doors
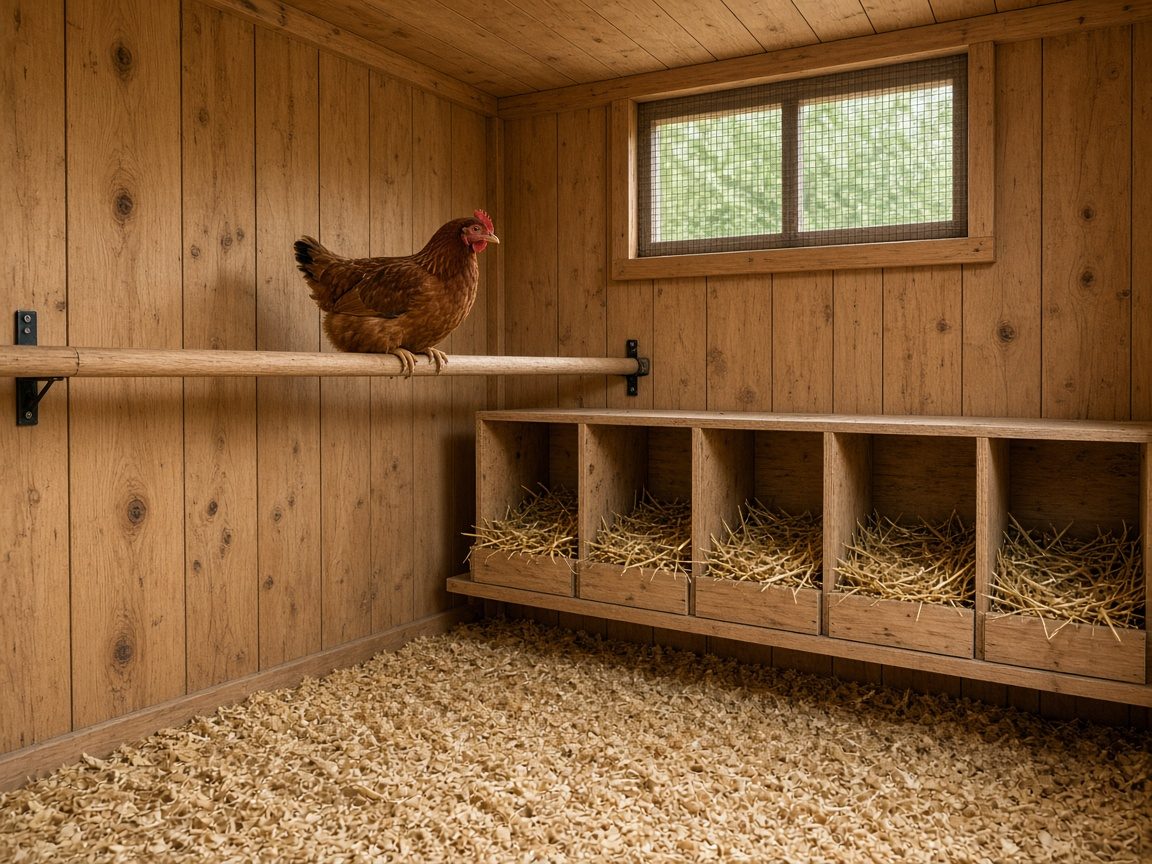
Hens sleep perched, so roost bars are essential. A 2x4 laid with the wide side up works well because the birds can cover their toes with their feathers on cold nights. Set roosts 18–36 inches above the floor and higher than the nest boxes. Hens like to sleep in the highest spot, and you do not want them sleeping (and pooping) in the nests.
Place nest boxes in a darker, quieter corner, a little off the floor. Many builders put them on the outside wall with a hinged lid so eggs can be collected without going inside. Line them with straw or shavings.
You will want three openings: a small pop door for the hens (about 12 × 14 inches) with a ramp, a human door or removable panel for cleaning, and the egg door on the nest boxes.
7. Materials and tools
A small coop for four to six hens can be built with ordinary lumber-yard materials:
| Part | Typical material |
|---|---|
| Base and legs | Pressure-treated 4x4 posts or 2x4s rated for ground contact, on pavers or concrete blocks |
| Frame | 2x3 or 2x4 studs |
| Floor and walls | Exterior plywood or T1-11 siding, painted or sealed on the outside |
| Roof | Corrugated metal or polycarbonate panels, or asphalt shingles over plywood |
| Run | 2x4 frame with 1/2-inch hardware cloth |
| Hardware | Exterior screws, hinges, two-step latches, washers for the mesh |
Tools: a circular saw or miter saw, a drill/driver, a tape measure and speed square, tin snips or side cutters for the mesh, a staple gun, a level and work gloves. Gloves matter, because cut hardware cloth edges are sharp.
Many keepers prefer not to use treated lumber on interior surfaces the birds peck at, and keep it to the base and parts in contact with the ground. Avoid cedar shavings as bedding; plain pine shavings or straw are the usual choice.
8. A simple build order
- Level the site and set pavers or blocks where the legs will stand.
- Build the base frame and legs, check it for square by measuring the diagonals, and level it.
- Frame and sheathe the floor. A sheet of vinyl flooring on top makes cleaning much easier.
- Build the walls as flat panels on the ground or sawhorses, with openings for the pop door, vents and nest boxes, then stand them up and screw them together.
- Add the roof with a slope to shed rain and an overhang of a few inches on every side.
- Install the nest boxes, roost bars and doors, then fit latches.
- Frame the run, wrap it in hardware cloth, add the apron and the run roof.
- Paint or seal the exterior, add the ramp and bedding, and do a final check for gaps larger than half an inch.
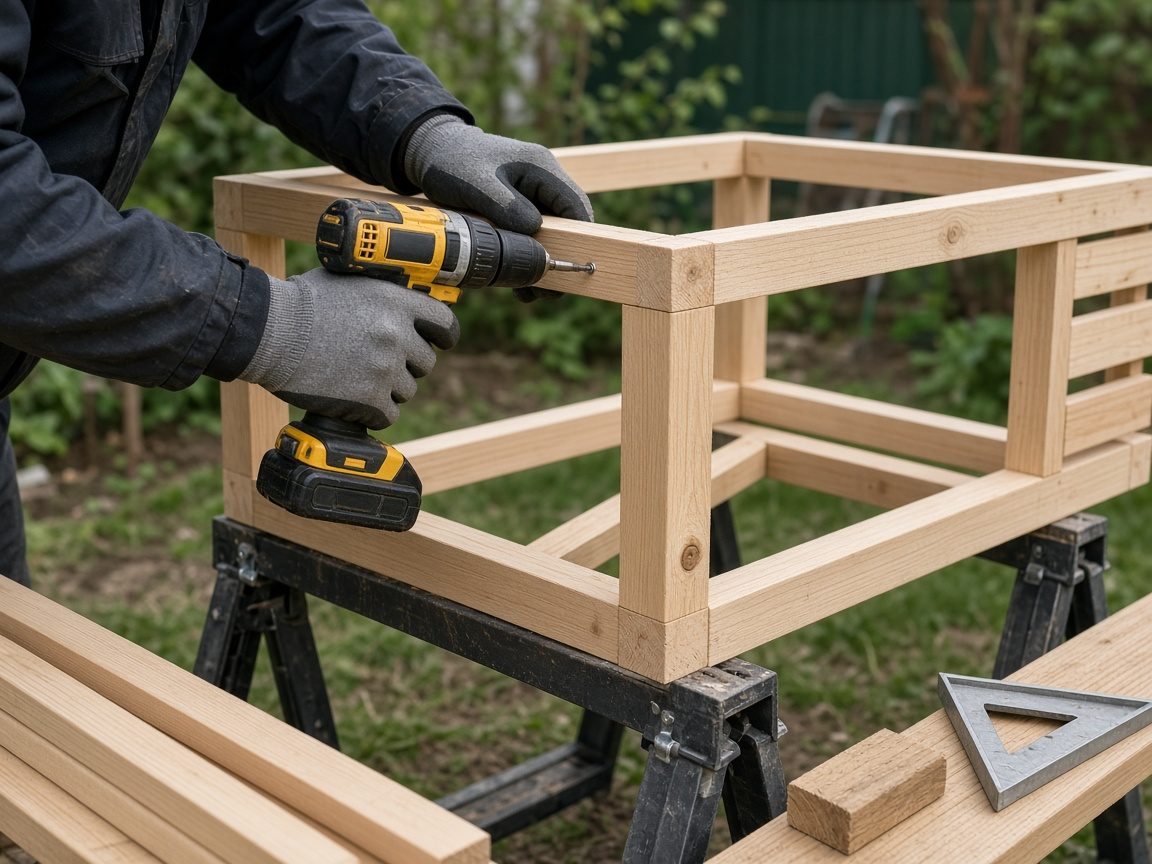
With a set of plans and pre-cut lumber, two people can usually finish a small coop over one or two weekends. Building panels first, as in the shed planning guide, keeps the job manageable even with basic tools.
9. Mistakes to avoid
- Building too small. Coop kits are often rated for more birds than fit comfortably. Use the square-foot numbers above.
- Trusting chicken wire. It is the most common reason flocks are lost to predators.
- Sealing the coop for winter. Ventilation still matters in the cold.
- No easy cleaning access. If cleaning is awkward, it gets put off.
- Forgetting the day-to-day. Plan where feed, water and bedding will go, and how water will be kept from freezing in winter.
One last practical note: wash your hands after handling birds, eggs or bedding, and keep a separate pair of shoes for the run. Backyard flocks are healthiest, and most fun, when the setup makes good habits easy.
Frequently asked questions
How big should a chicken coop be for 4 hens?
Plan on about 3–4 square feet of coop floor per standard hen, so roughly 4 × 4 feet for four hens, plus a run of at least 32–40 square feet.
Is chicken wire good enough for a coop?
No. Chicken wire keeps chickens in but does not keep predators out. Use 1/2-inch galvanized hardware cloth on the run and all openings.
How long does it take to build a chicken coop?
A small coop for four to six hens usually takes one or two weekends for two people with basic tools and a clear plan.
Do I need a permit for a backyard chicken coop?
It depends on your town. Many places regulate the number of hens, roosters and setbacks, and some require a permit for larger coops, so check local rules first.
Free printable: Backyard Shed Planning
A practical pre-build checklist. Enter your email to get the PDF.